












Underwater Photography Tips for Caribbean Waters
Underwater Photography Tips for Caribbean Waters explains how travellers and divers can take sharper, more colourful and more responsible underwater photographs in Caribbean conditions. The article focuses on practical techniques rather than expensive equipment and explains that even clear Caribbean water presents challenges because water absorbs colour, reduces contrast and scatters light. A major recommendation is to get close to the subject without disturbing it. Reducing the distance between the camera and subject means less water between the lens and the subject, which generally improves colour, contrast and detail. This is particularly important for reef and marine-life photography.

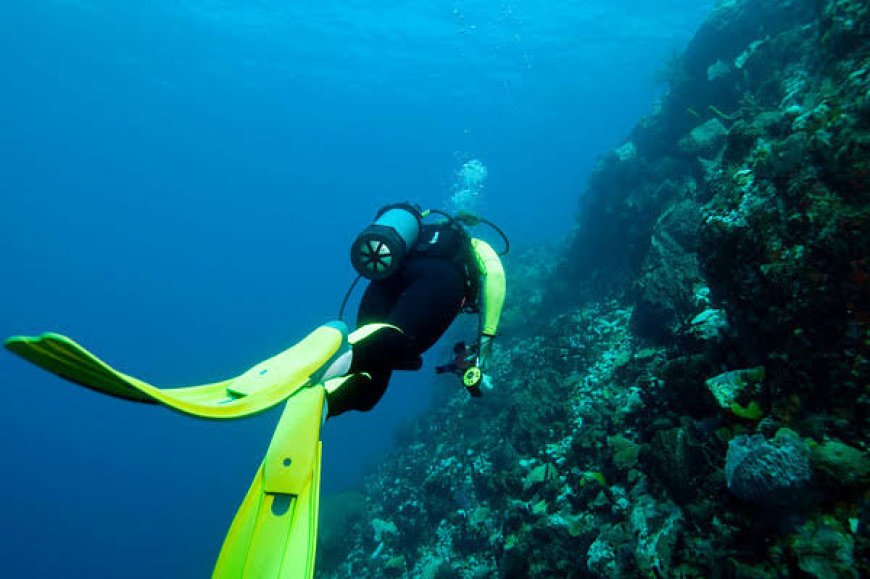
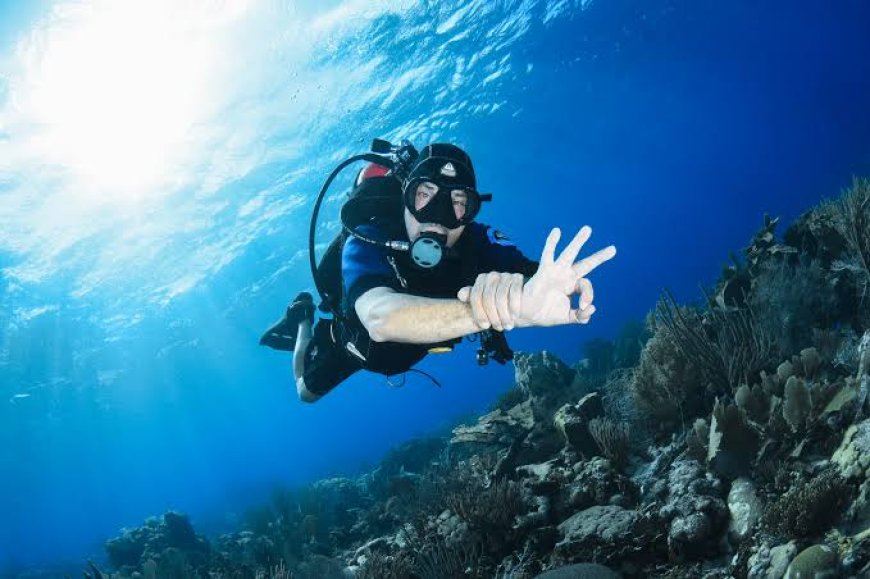
The Caribbean is one of the most interesting regions in the world for underwater photography. Warm water, coral reefs, walls, wrecks, sandy bottoms and a wide range of marine life give photographers many subjects to work with. Depending on the island and weather conditions, visibility can range from moderate to exceptionally clear. Bonaire reports average underwater visibility of around 20–30 metres, while Cozumel commonly reports 25–35 metres. Turks and Caicos also have extensive reef and marine environments suitable for underwater photography.

But clear water does not automatically produce good photographs. Underwater photography has different challenges from normal photography on land. Water absorbs light, reduces contrast and changes the appearance of colours. Red and other longer wavelengths disappear as depth increases, leaving photographs with a blue or green cast. Movement from currents, waves, breathing and marine life can also make images blurry.
The good news is that most of these problems can be managed with better preparation and technique. You do not necessarily need a professional camera system costing thousands of dollars. A modern action camera, compact waterproof camera or properly housed mirror less camera can all produce useful results when matched with the right conditions and shooting technique.
The following guide explains how to prepare your equipment, choose subjects, use natural and artificial light, control your position in the water, protect coral reefs and improve your photographs in Caribbean conditions.
Understand the Caribbean Underwater Environment
Before thinking about camera settings, understand what happens to light underwater.
When sunlight enters the ocean, water absorbs different wavelengths at different rates. Red disappears first, followed by orange and yellow as depth increases. This is why a colourful reef can look mostly blue when photographed without additional lighting.
Water also contains particles that scatter light. Even apparently clear Caribbean water is not completely free of suspended material. The farther your camera is from the subject, the more water and particles are between the lens and the subject. This creates two immediate rules.
Get closer to your subject whenever it is safe to do so, and use the least amount of water between your lens and the subject.
Turks and Caicos' official tourism information also recommends getting close because reducing the distance improves colour and sharpness and reduces the amount of suspended material between the camera and subject.
This does not mean chasing animals or moving dangerously close to coral. Good underwater photography depends on controlled movement.
Choose Your Camera According to Your Experience
You do not need to begin with a professional underwater camera system. An action camera is often a practical starting point for beginners. Modern models are compact, stabilized and particularly useful for wide-angle reef scenes, divers, turtles, rays and larger marine animals. A recent Caribbean diving guide recommends action cameras as a practical beginner option, especially for wide-angle video.
A rugged compact camera can be more useful if still photography is your priority. Cameras in this category can offer better close-up and macro capabilities than many action cameras.
For serious photographers, a mirror less camera inside a dedicated underwater housing provides much more control. However, the cost and complexity increase significantly because the system may require a housing, ports, strobes, arms, batteries and other accessories. The most expensive setup is not automatically the best choice for a beginner.
A diver who understands buoyancy, composition and lighting can often produce better photographs with a simple camera than someone who has expensive equipment but poor control in the water.
Protect the Camera before Entering the Water
Equipment preparation is one of the least exciting parts of underwater photography, but it can save an entire vacation. If you use housing, inspect the seals and O-rings carefully. Look for hair, sand, dust or other particles that could prevent the seal from closing correctly. Make sure the housing is properly latched. Check battery and memory-card compartments before closing the system. Test the controls.
If you are using a new housing, practice operating the important buttons on land before your dive. Canon's current underwater photography guidance also recommends checking camera equipment carefully and rinsing equipment with fresh water after dives. A small piece of sand on an O-ring can potentially allow water into housing. Taking five minutes to inspect the system is much better than discovering a leak underwater.
Carry Spare Batteries and Memory Cards
Underwater photography encourages people to take many photographs. That is useful because moving subjects rarely produce a perfect frame on the first attempt. However, large files and high-resolution video can quickly fill a memory card. Carry enough storage for your planned dives. Also keep spare batteries charged and protected from moisture. For longer dive days, battery management becomes especially important because cold or repeated use can reduce battery performance, even in warm Caribbean water.
Practice with the Camera before Diving
Do not learn every camera control underwater. This is particularly important with a complicated mirror less camera and housing. Practice changing shutter speed, ISO, focus mode, exposure compensation and lighting controls while wearing the gloves or equipment you will use during the dive.
If you cannot find a button quickly on land, it will be even harder while wearing a mask and moving underwater. Action-camera users should also practice starting and stopping recording, changing modes and checking battery status.
The goal is to spend your dive photographing subjects rather than trying to remember which button does what.
Master Buoyancy before Photography
This is arguably the most important underwater photography skill. A photographer who cannot maintain neutral buoyancy will struggle to keep the camera stable. Every time you move your hands to control the camera, your body can move. Every breath changes your position slightly.
If you are constantly kicking, you may stir up sand and create a cloud of particles directly in front of your lens. Poor buoyancy also creates a conservation problem. Accidentally touching coral with your fins, knees or camera can damage the reef. Caribbean dive guides repeatedly emphasize buoyancy as a foundation for underwater photography. Before attempting complicated photographs, learn to hover comfortably and make small movements using your breathing and body position. Your photographs will improve, and your impact on the reef will decrease.
Never Use Coral as a Camera Rest
- A common mistake is placing a hand, camera housing or fin against coral to stabilize the shot.
- Do not do this.
- Coral is living marine habitat. Even apparently hard surfaces can be fragile.
- Instead, use neutral buoyancy and controlled breathing.
- If you need stability, look for an appropriate sandy or open area where your contact will not damage marine life, but even then, avoid unnecessary contact.
- The best underwater photographers learn to stabilize themselves without touching the environment.
Get Close, but Do Not Chase
Distance is one of the biggest factors affecting underwater image quality. The closer your lens is to the subject, the less water light must travel through before reaching the camera. This generally means better contrast, stronger colour and greater detail.
But "get close" does not mean swimming directly toward a turtle, shark or fish until it becomes uncomfortable.
- Move slowly.
- Approach from an angle.
- Stop when the animal shows signs of changing behaviour.
- Let marine life decide how close it wants to be.
A recent Caribbean photography guide recommends approaching slowly and avoiding sudden movements that may disturb marine animals.
The best wildlife photograph is not worth stressing an animal.
Shoot Slightly Upward
One of the easiest composition improvements is changing your camera angle.
Beginners often point the camera downward because that is where the fish or reef is located.
The result can be a photograph of a fish against sand.
Instead, whenever the situation allows, position yourself slightly below or level with the subject and photograph upward toward open water.
This can place the animal against a blue-water background.
It also creates depth and can make the subject more visually separated from the reef.
Several Caribbean photography guides recommend shooting upward for this reason.
Use Natural Light in Shallow Water
Shallow Caribbean reefs can provide excellent opportunities for natural-light photography.
If the sun is strong and the water is clear, you may not need a strobe.
Position yourself so the sunlight illuminates the subject.
Avoid allowing the sun to create excessive glare directly into the lens unless you intentionally want a silhouette or sunburst.
Early morning can also provide interesting light. A 2026 Cozumel photography guide recommends morning dives for stronger vertical light penetration and opportunities to capture rays of sunlight through the water.
Light changes throughout the day, so the same reef can produce different photographs at different times.
Know When You Need a Red Filter
Red filters are commonly used for underwater video and natural-light photography because water removes red wavelengths as depth increases.
- A filter can help restore some colour balance in appropriate conditions.
- However, a red filter is not suitable for every situation.
- In very shallow water, it may make the image overly red.
If you use artificial lighting, a filter may also be unnecessary because the light from your strobe or video light can restore colours directly.
A recent Caribbean diving guide recommends red filters for certain natural-light depths and notes that they should be removed in very shallow water. Always follow the recommendations for your particular camera and filter.
External Lights Change the Results
A strobe or underwater video light can bring back colours that natural sunlight cannot provide at depth. This is particularly useful for close subjects such as coral, small fish, crabs, shrimp and other macro subjects. The important point is distance. Artificial light loses effectiveness as the distance between the light and subject increases.
Turks and Caicos' underwater photography guide notes that flashes are most useful at relatively short distances and can actually make distant photographs worse by illuminating particles between the camera and subject.
If you see many bright spots in your photograph, those may be suspended particles reflecting your flash. Move closer and angle the lights away from the water immediately in front of the lens.
Avoid Backscatter
Backscatter is one of the most common underwater photography problems. It appears as small bright spots or cloudy particles throughout the photograph. The problem occurs when your artificial light illuminates particles suspended between the camera and subject.
The simplest solution is to reduce the amount of water between you and the subject. With external strobes, position the lights away from the lens axis so that the light reaches the subject without directly illuminating particles in front of the lens. This technique becomes especially important on sandy bottoms, where fin movement can disturb sediment.
Choose the Right Subject
The Caribbean offers a wide range of subjects.
You can photograph:
- Coral reefs.
- Sea turtles.
- Stingrays.
- Eagle rays.
- Reef fish.
- Parrotfish.
- Angelfish.
- Groupers.
- Nurse sharks.
- Crustaceans.
- Sea fans.
- Sponges.
- Wrecks.
- Divers.
- Walls and reef formations.
- The best subject depends on your equipment and experience.
- A wide-angle action camera is well suited to reef scenes and larger animals.
- A compact or mirror less setup with macro capability is more appropriate for tiny subjects.
- Do not try to photograph everything on one dive.
- Choose a theme.
- One dive can be your wide-angle reef dive.
- Another can focus on macro.
- A third can focus on marine-life behaviour.
- This gives you a clearer photographic goal.
Wide Angle Reef Photography
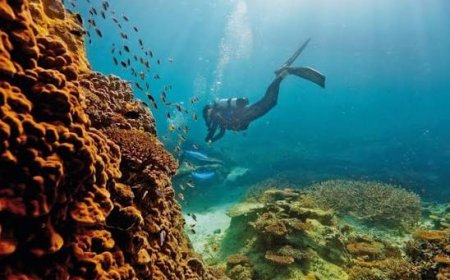
- Wide-angle photography is ideal when you want to show the scale of a Caribbean reef.
- Instead of filling the entire frame with coral, look for a strong foreground, middle ground and background.
- A coral formation can provide the foreground.
- A diver or turtle can provide the middle ground.
- Blue water can create the background.
- This gives the photograph depth.
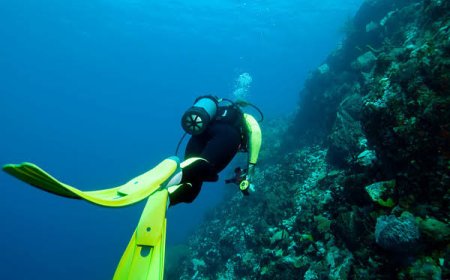
- Including a diver can also provide a sense of scale.
- For wrecks, a diver in the frame can show how large the structure is.
Photograph a Diver in the Scene
If you are diving with a buddy, ask them to participate in some photographs. The diver can swim through the frame, look toward a coral wall or hover near a wreck. This creates a human element and helps communicate scale. Before the dive, agree on simple signals. Decide where the diver should position themselves. Decide whether they should face the camera or look toward the reef. Good communication prevents you from wasting time underwater.
Macro Photography Requires Patience
Macro photography is very different from wide-angle photography. The subject may be only a few centimetres long. A shrimp, blenny, nudibranch or small crab can easily become the main subject. The challenge is finding the animal, getting close without disturbing it and achieving accurate focus. Move slowly.
- Set up your camera before approaching.
- Avoid sudden movements.
- Take several photographs.
A recent guide to underwater photography in Roatán similarly recommends preparing settings and lighting before moving close to a small subject.
Macro photography rewards patience more than speed.
Use Your Dive Guide
- Your dive guide can be one of your best photographic resources.
- Local guides know where particular animals tend to hide.
- They may know which areas have cleaner backgrounds, where turtles commonly pass or where small creatures are frequently found.
- Tell the guide before the dive what you want to photograph.
- If you are doing a macro dive, say so.
- If you want wide-angle reef photographs, explain that as well.
- This can improve your chances of finding appropriate subjects.
Shoot More Than One Frame
Marine animals move. Your hands move. The water moves. Your subject may blink, turn or swim away. Instead of taking one photograph and immediately moving on, take several frames when appropriate. Use burst mode if your camera supports it. For moving subjects, this increases the chance that one frame will have the right body position and sharp focus. A 2026 Cozumel guide specifically recommends shooting in short bursts during drift diving because movement makes the timing of the ideal frame unpredictable. Do not spray hundreds of photographs without purpose, however. More files mean more time sorting and editing later.
Shutter Speed for Moving Subjects
Shutter speed controls how motion is recorded. A very slow shutter speed can create blur from your movement or the animal's movement.
For moving fish, many underwater photographers start around 1/125 second or faster and adjust according to light and subject movement.
A recent Caribbean diving guide suggests around 1/125 second for relatively stationary subjects and 1/250 second for moving fish as useful starting points. These are starting points, not universal rules.
Your camera, lens, depth, available light and creative intention all affect the correct setting.
Keep ISO under Control
- Higher ISO allows your camera to work in lower light but can introduce digital noise.
- If you are shooting in bright shallow water, you can often keep ISO relatively low.
- At greater depths or in darker conditions, you may need to raise it.
- Do not sacrifice a sharp photograph simply to keep ISO extremely low.
- A slightly noisy but sharp photograph is generally more useful than a clean but blurry photograph.
Aperture and Depth of Field
- If you have manual control over aperture, your choice affects both light and depth of field.
- A smaller aperture such as f/8 can provide greater depth of field, which can help with macro subjects.
- But smaller apertures also reduce the amount of light reaching the sensor.
- Your exact setting will depend on the camera and lighting system.
- Beginners using action cameras or fully automatic compact cameras should not become obsessed with aperture.
- Focus first on distance, stability, composition and light.
White Balance Matters
White balance controls how your camera interprets colour. Underwater, automatic white balance can struggle because the environment is dominated by blue or green light. Some cameras offer dedicated underwater modes. Others allow custom white balance. For cameras that support manual white balance, you can set it using a neutral subject at the depth where you are shooting. The correct approach depends on your camera. If you shoot RAW with a suitable camera, you have more flexibility to correct white balance later. For video, however, getting the colour as close as possible during recording can make editing easier.
Shoot RAW When Appropriate
RAW files preserve considerably more image information than compressed JPEG files. This gives you more flexibility to adjust white balance, exposure, highlights and shadows during editing. The trade-off is larger files and the need for post-processing. If you are serious about underwater still photography, RAW can be worth using. For casual travel photographs, JPEG may be perfectly adequate. The important thing is to choose a format that matches how you intend to use the photographs.
Underwater Video Needs Different Thinking
If you are recording video rather than still photographs, movement becomes even more important.
- Move the camera slowly.
- Avoid rapid pans.
- Hold the camera steadily.
- Use stabilization where appropriate.
- Keep your subject within the frame.
Action cameras can be especially effective for underwater video because their wide lenses capture large scenes and their stabilization helps compensate for small movements.
4K/30 is a useful general-purpose starting point for many cameras, while higher frame rates can provide smoother slow-motion footage if lighting is sufficient. A current Caribbean beginner guide recommends 4K/30 or 1080/60 as practical options.
Plan around Visibility
Visibility is one of the most important environmental factors.
It can change with weather, rainfall, wind, tides, currents and local conditions.
Turks and Caicos notes that slack high tide can offer favourable visibility, while sediment and local conditions can affect water clarity.
BVI guidance also notes that weather, tides and seasonal conditions can influence visibility.
If photography is the main purpose of your trip, ask local dive operators about current conditions instead of assuming that historical visibility statistics will describe your particular day.
Consider the Weather
Rain and strong winds can affect underwater conditions.
A calm, sunny day can produce clearer water and better natural light, although excellent photographs are possible in less-than-perfect conditions.
During the Caribbean hurricane season, weather can change quickly.
The official Atlantic hurricane season runs from June through November.
If you plan a photography trip during this period, build flexibility into your schedule.
Do not risk a dive simply to obtain a photograph.
Choose the Right Dive Site
Different sites are suited to different types of photography.
Walls are excellent for wide-angle compositions.
Shallow reefs can be good for natural-light photography.
Wrecks offer strong lines and opportunities to include divers for scale.
Sandy areas can be useful for macro subjects.
Protected marine areas can provide interesting wildlife encounters, but photographers must follow local rules.
Bonaire, for example, offers many dive sites and shore-access opportunities, while Cozumel's protected reef system provides a wide range of reef and wall environments.
Think About the Background
- A beautiful subject can produce a poor photograph if the background is distracting.
- Before pressing the shutter, look beyond the animal.
- Can you see open blue water?
- Is there another diver behind it?
- Is there a piece of equipment crossing the frame?
- Is the animal against sand or colourful coral?
- Small changes in your position can completely change the background.
- Move left.
- Move right.
- Lower your camera.
- Raise it slightly.
- Wait for the animal to move.
- Good composition often comes from small adjustments rather than complicated camera settings.
Use Negative Space
Not every photograph needs to fill the frame with coral or fish.
Leaving open blue water around a subject can create a cleaner image.
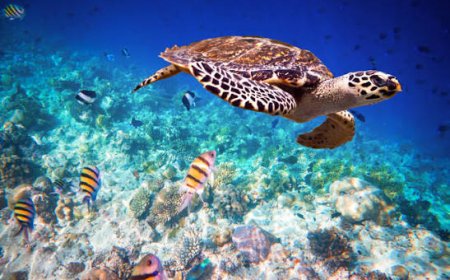
This is particularly effective when photographing turtles, rays, sharks or individual reef fish.
The empty space can show where the animal is moving.
Try placing the subject slightly to one side rather than directly in the middle.
Photograph Behaviour Instead of Just Animals
A photograph of a fish swimming is useful.
A photograph showing interesting behaviour can be much more memorable.
Look for:
- A cleaner shrimp working on a fish.
- A turtle feeding.
- Fish schooling together.
- A ray moving over sand.
- A grouper interacting with another fish.
- A small animal hiding among coral.
- A diver observing marine life.
Instead of immediately pressing the shutter, watch the animal for a few seconds.
Understanding behaviour gives you a better chance of predicting movement.
Avoid Chasing Wildlife
- Chasing a fish usually results in poor photographs.
- The animal moves away.
- You stir up particles.
- Your breathing becomes faster.
- Your buoyancy gets worse.
- Your photographs become less stable.
- Stop and wait.
Many marine animals return to the same area after a diver stops pursuing them. This also reduces disturbance. Responsible wildlife photography should always prioritize the animal over the photograph.
Never Touch Marine Life
Do not touch turtles, rays, sharks, coral, starfish or other marine organisms to get a better photograph. Do not move animals. Do not block their escape route. Do not feed wildlife unless you are participating in a properly regulated activity where feeding is specifically permitted and managed. Your role as a photographer is to observe. The photograph should document natural behaviour rather than create it.
Protect Your Equipment from Salt Water
- After every dive, rinse your camera and housing thoroughly with fresh water.
- Salt crystals can accumulate around buttons, hinges and seals.
- Allow the equipment to dry according to the manufacturer's instructions.
- Do not open housing while it is wet.
- Keep the camera protected from direct heat and prolonged sun exposure when possible.
- A shaded, dry area is preferable when preparing equipment between dives.
Check the Housing between Dives
- After the first dive, inspect the housing carefully.
- Look for moisture.
- Check the seal area.
- Make sure the controls still operate correctly.
- If you suspect water has entered the housing, stop using it until you identify the problem.
- Do not assume a small amount of moisture is harmless.
- Water and electronics are a bad combination.
Use a Tether
A camera can easily become separated from you underwater. A secure wrist tether or appropriate camera lanyard can help prevent accidental loss. This is especially useful when diving in currents or when photographing large animals. However, make sure the tether does not create a snag hazard. It should not interfere with your regulator, BCD, gauges or other diving equipment. Safety always comes before photography. Do Not Let Photography Affect You’re Diving This is particularly important for beginners. Do not become so focused on a camera screen that you forget your depth, air supply, buddy or surroundings.
- Check your gauges.
- Maintain your planned depth.
- Stay with your buddy or group.
- Follow the dive leader's instructions.
- Maintain appropriate buoyancy.
If taking a photograph requires you to violate your normal dive plan, skip the photograph.
There will always be another subject.
Edit Without Overdoing It
- Underwater photographs often need some correction.
- Basic editing can improve white balance, contrast, exposure and colour.
- Crop distracting areas.
- Adjust highlights and shadows.
- Correct the blue or green cast.
- Increase contrast carefully.
- Avoid pushing saturation too far.
A photograph with unnatural neon colours may look impressive on a phone screen but will not accurately represent the reef. The goal is to recover information lost because of the underwater environment, not create colors that were never there.
Remove Backscatter Carefully
Small particles can sometimes be reduced during editing. But editing software should not become an excuse for poor shooting technique. If every photograph contains heavy backscatter, work on lighting position and distance. Move closer. Avoid disturbing sand. Angle the strobes away from the lens. Better technique usually produces a bigger improvement than more editing.
Create a Caribbean Underwater Photo Story
Instead of returning home with hundreds of similar fish photographs, create a visual story. Start with a photograph of the boat or shoreline.
- Show the descent.
- Photograph the reef.
- Include a wide-angle scene.
- Add a close-up of a small animal.
- Photograph your dive buddy.
- Show a wreck or wall.
- End with a photograph looking toward the surface.
This produces a collection that communicates the experience of diving in the Caribbean rather than simply showing individual marine animals.
Best Practices for Different Caribbean Conditions
- If the water is extremely clear, use wide-angle photography to take advantage of the visibility.
- If the water contains more particles, get closer and consider macro photography.
- If the sun is strong and you are shallow, experiment with natural light.
- If you are deeper, consider artificial lighting.
- If there is current, plan your composition and shoot in short bursts.
- If the reef is covered with small life, switch to macro.
- If you are photographing large animals, use a wide lens and give the animal room in the frame.
- The ability to adapt is more important than having one perfect camera setting.
Caribbean Destinations for Underwater Photographers
Several Caribbean destinations are particularly well known for underwater photography opportunities.
Bonaire is attractive to photographers because of its extensive diving network, including many shore-access sites. Current destination information reports 86 official dive sites and more than 50 accessible from shore, with visibility commonly around 20–30 metres.
Cozumel offers clear water, reef walls and a broad range of subjects. A current 2026 guide reports typical visibility around 25–35 metres and highlights opportunities ranging from macro subjects to large animals.
Turks and Caicos offers reefs, walls, sandy channels and marine habitats, with West Caicos Marine National Park among the areas highlighted for underwater photography.
Barbados offers shallow reefs and wreck-diving opportunities, giving photographers a mixture of reef and structural subjects.
Punta Cana and the Dominican Republic also offer reef, wreck and marine-life photography opportunities, with local conditions varying by site and weather.
These are examples rather than a definitive ranking. The best destination depends on the type of photographs you want to make.
A Simple Beginner Setup
If you are taking your first underwater photography trip, keep the setup simple.
A practical beginner system can include a waterproof action camera or compact camera, a secure tether, spare battery, extra memory card, appropriate filter if needed, microfiber cloth, fresh-water rinse container and a protective dry bag for transport.
- You do not need multiple lenses and strobes on your first few dives.
- Learn how your camera behaves.
- Understand how changes with depth colour.
- Practice buoyancy.
- Learn to approach animals.
Once you understand what you want to photograph, you can decide whether additional equipment is worth the cost.
A Practical Pre-Dive Checklist
- Before entering the water, check the battery.
- Check available memory.
- Inspect the housing.
- Check O-rings and seals.
- Confirm the camera is recording or ready to shoot.
- Make sure your tether is secure.
- Confirm your lighting or filter setup.
- Agree on communication with your buddy.
- Know what type of photography you are doing.
- Then put the camera aside and complete your normal dive preparation.
- The camera should be part of your dive plan, not the entire dive.
What's Your Reaction?
 Like
0
Like
0
 Dislike
0
Dislike
0
 Love
0
Love
0
 Funny
0
Funny
0
 Angry
0
Angry
0
 Sad
0
Sad
0
 Wow
0
Wow
0